How to Remove & Install Wheel Position Sensor for Bobcat Loader
Chinaobd2 is a leading supplier of all kinds of Car Diagnostic Tool, Truck Diagnostic Tool, OBD2 Code Reader, Car Key Programmer,ECU Chip Tunning,etc. Currently, the top selling product including: VCDS VAG COM Cable, iProg+ Programmer, Scania VCI3
This illustration show you the procedures on how to remove and install wheel position sensor for Bobcat loader.This method apply for all Bobcat loader series.And for more Bobcat repair guide,please check it here:Bobcat Advanced Troubleshooting System
Procedures:

Remove the loader hub.Remove the two mount bolts (Item 1) [Figure 60-81-11]and remove the wheel position sensor/steering cylinder cover form the loader.

Disconnect the wheel sensor wire connector (Item 1)[Figure 60-81-12] from the loader wiring harness.

With a needle nose plier, remove the wedge (Item 1)[Figure 60-81-13] from the wheel sensor wire connector.

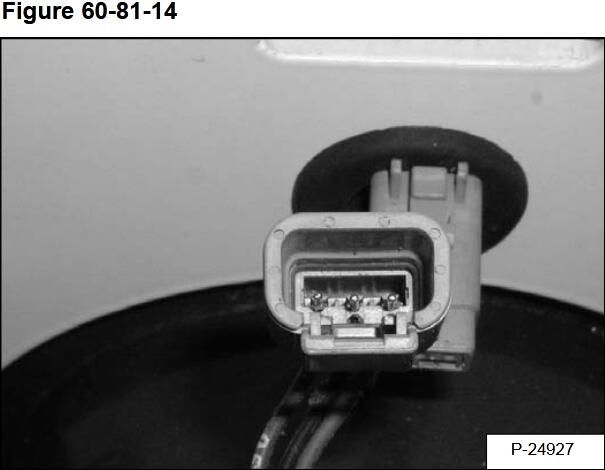
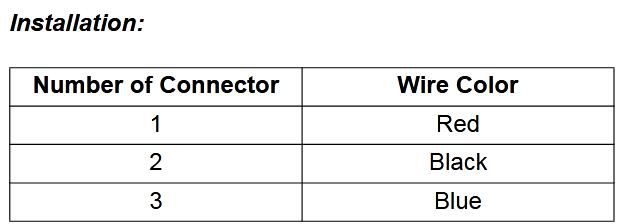
With a pointed screw driver lightly press in on the tab sand remove the individual wires from the connector[Figure 60-81-14].


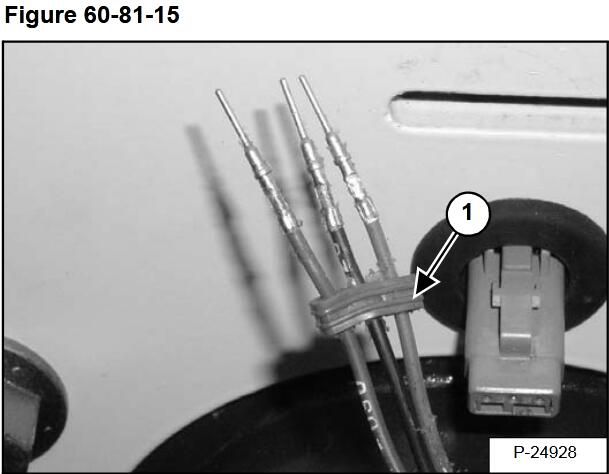
Remove the wire retainer (Item 1) [Figure 60-81-15]from the wires.

Remove the two mounting bolts (Item 1) [Figure 60-81-16] from the wheel sensor.Installation: Tighten mounting bolts to 25-30 in.-lb.(2,85-3,39 N•m) torque.

Lift the wheel sensor up and lightly pull on the sensor while pushing the wires (Item 1) [Figure 60-81-17] thru the face of the casting.Remove the wheel position sensor from the loader.
More topics about Bobcat,please refer to:Bobcat trouble repair
This article tech Supported by China OBD2,

No comments:
Post a Comment